
We were still left with what the hell to do with the remaining big piece of our English Cherry slab. I really wanted to turn it onto a desk but we were faced with a few issues. It had a very large and unsightly gouge out of the top surface, the epoxy filling that had been done was poor quality and uneven and the surface had ‘scag’ marks all across it. To sand it more would only serve to make it thinner and more unstable (warp). We could cut it at the gouge but the whole point was to have a long gorgeous cherry piece of furniture dominating the room. Reducing it’s length would make it less practical and reduce its impact in the room.
I was about to come to the uncomfortable conclusion this was a bust and I’d have to go through the very lengthy and angsty process of trying to claim some kind of refund, when Patrick saved the day. He suggested the only option we had left was to try an epoxy pour on the surface. We’d need to tidy up the scarring as much as possible first and he warned he’d never actually done this before, but wanted to try. Given there were no other options, I set about researching both the how and the best type to use. Again, the worst that could happen was we’d have to dump it all and try to recover our money and start again.
This was a totally new concept and process for me. We weren’t planning on creating a river table or anything. Just creating a smooth, glass like surface on the top and edges. After some dithering and discussing, I decided to opt for Glass Cast epoxy here in the UK. They seemed to be one of the best, have clear instructional videos and the best choice of epoxy to suit our needs and piece.
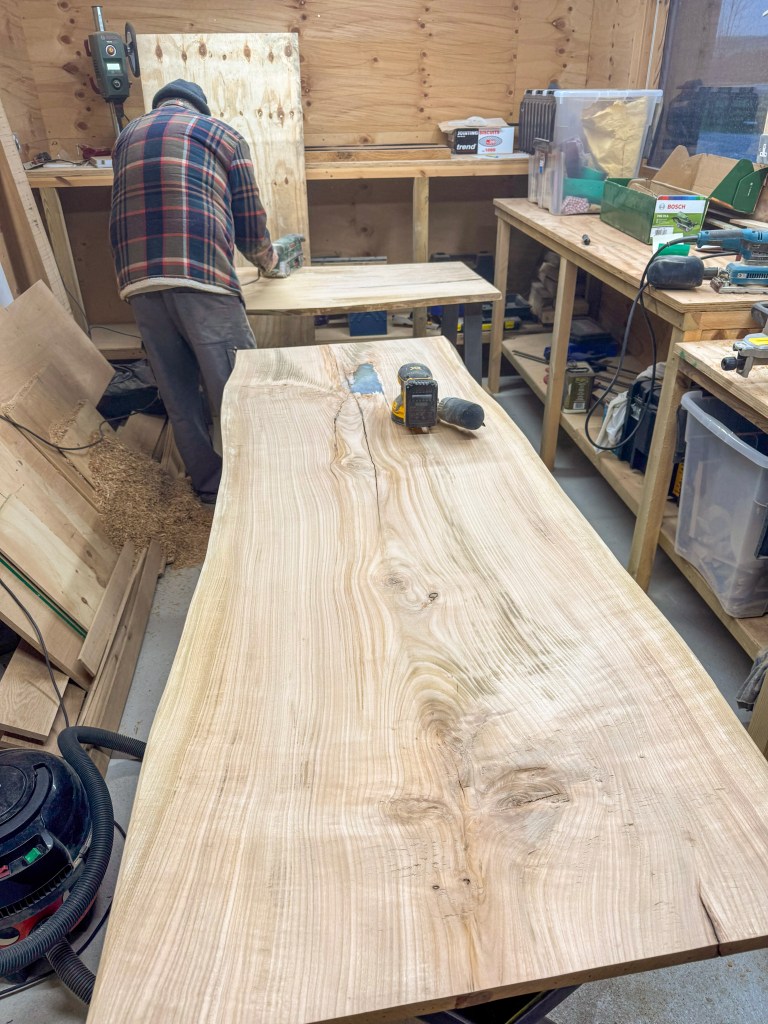
We set about preparing the desk before ordering so we knew quite what it was we were ordering. Patrick expertly smoothed out the gouge. It was deep and big but at least now it didn’t snag or look too ugly. We sanded and smoothed out the rest as best we could and took the plunge and ordered the resin.
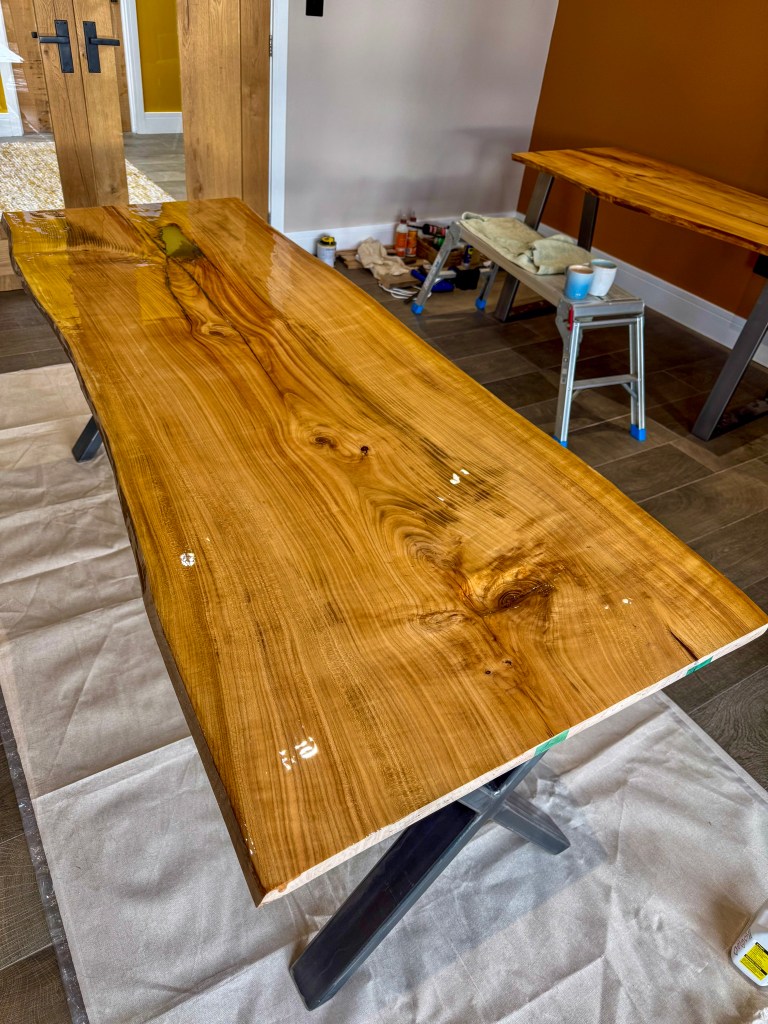
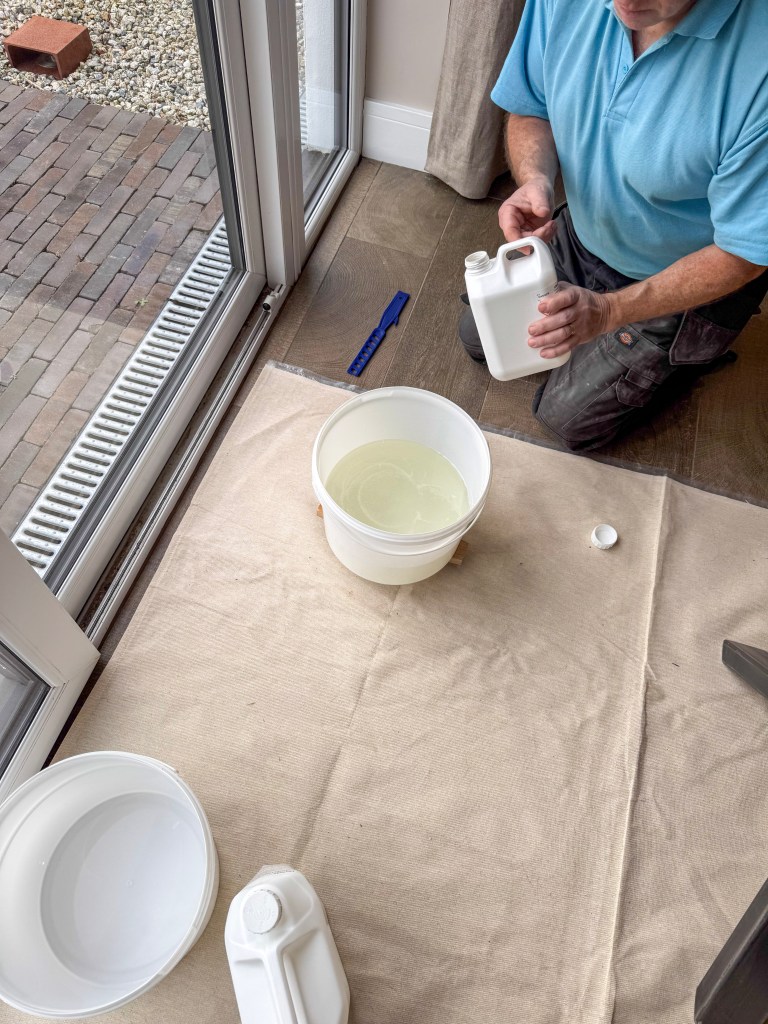
The cost wasn’t cheap and I’m sure there are cheaper options but I felt comfortable with the clear and concise ‘beginner’ instructions included on the website. £180 all in for the kit which included mixing buckets, stirring tools, tape for the sides as well as the resins themselves and sanding discs. I’d figured we’d use one type of epoxy for the deep hole and a much larger amount for the surface. I mounted the cherry slab onto the pre-purchased steel legs, again from my trusty Etsy trader, so the piece was easier to work on.
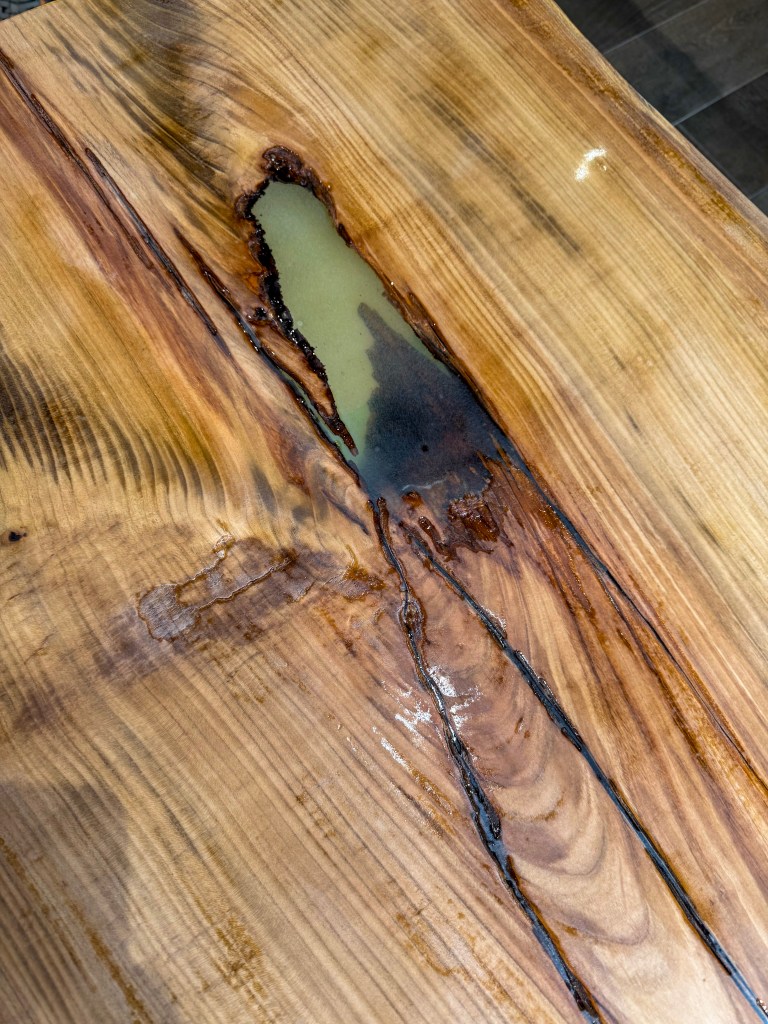
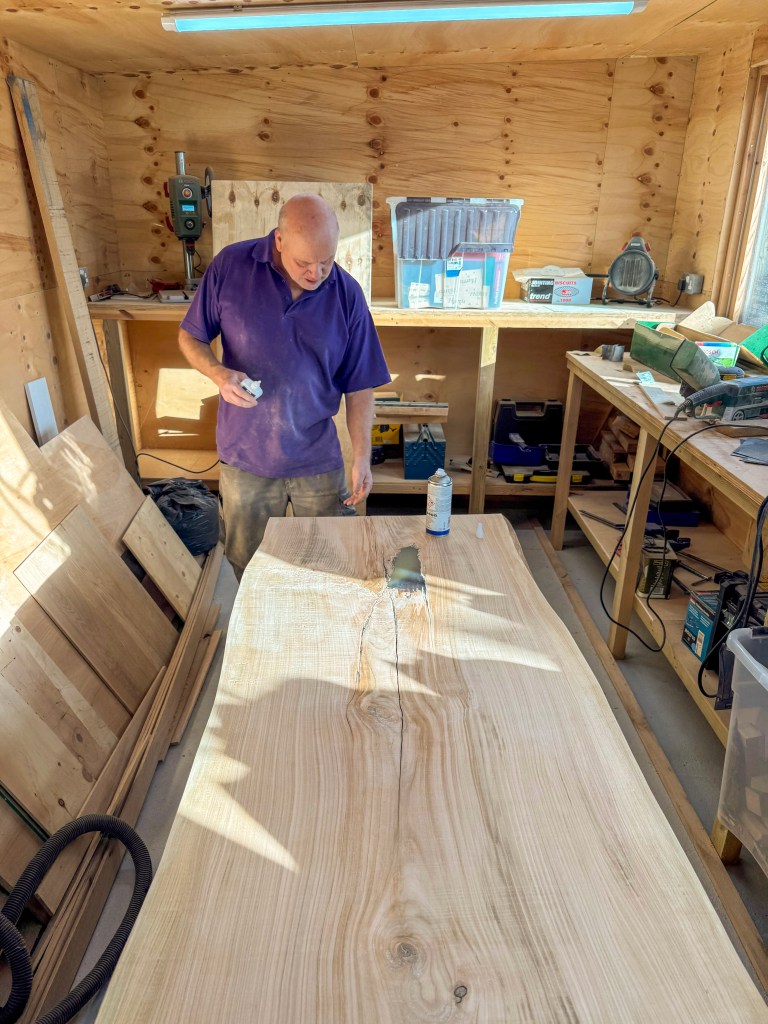
The first job was to mix and pour the smaller resin for the hole. I’d fill that first, leave it to cure and then with a flatter desk surface, attempt the whole top. With a deep breath and some trepidation, I mixed the solution. This epoxy was designed for deeper pours, between 5-10mm I think. I carefully poured it into the gouge, left it a few minutes and then heated it with a hot hairdryer. Doubting the need for this (it’s supposed to pull air bubbles, forced out of the wood grain, rise to the surface and pop). I was amazed to see it worked easily and painlessly. Wow. When 10 minutes since pour had elapsed, I walked away knowing that staying would mean I’d fiddle with it and no doubt create trouble. I left it overnight and made sure the room maintained the correct working temperature all night, using our room thermostat.
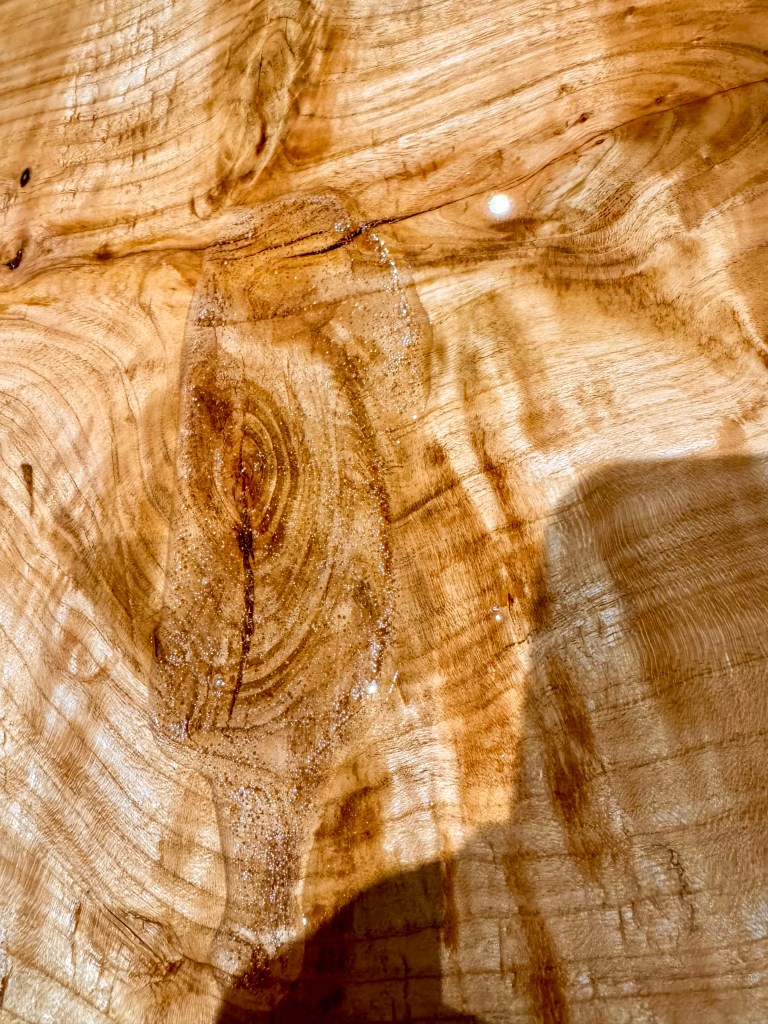
I returned the next morning to a perfectly clear and successful first small pour. I had to walk away again as it hadn’t had time to sufficiently harden and be ready for stage 2. However the result was better than I’d hoped. The gouge was now filled and incredibly looked barely noticeable from the top.
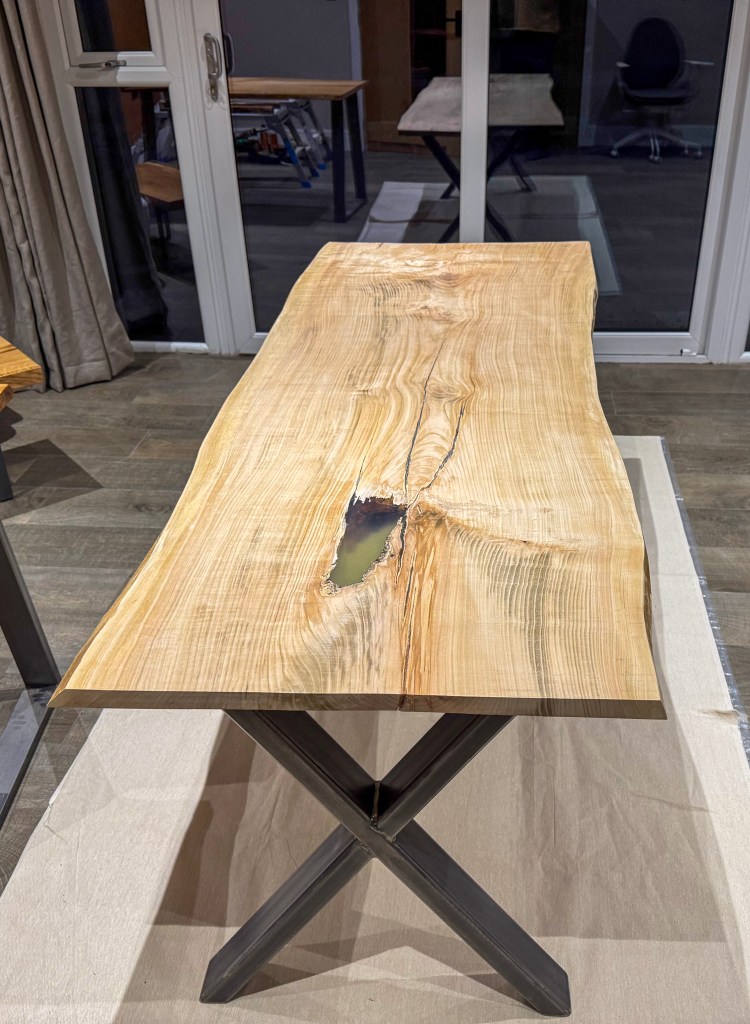
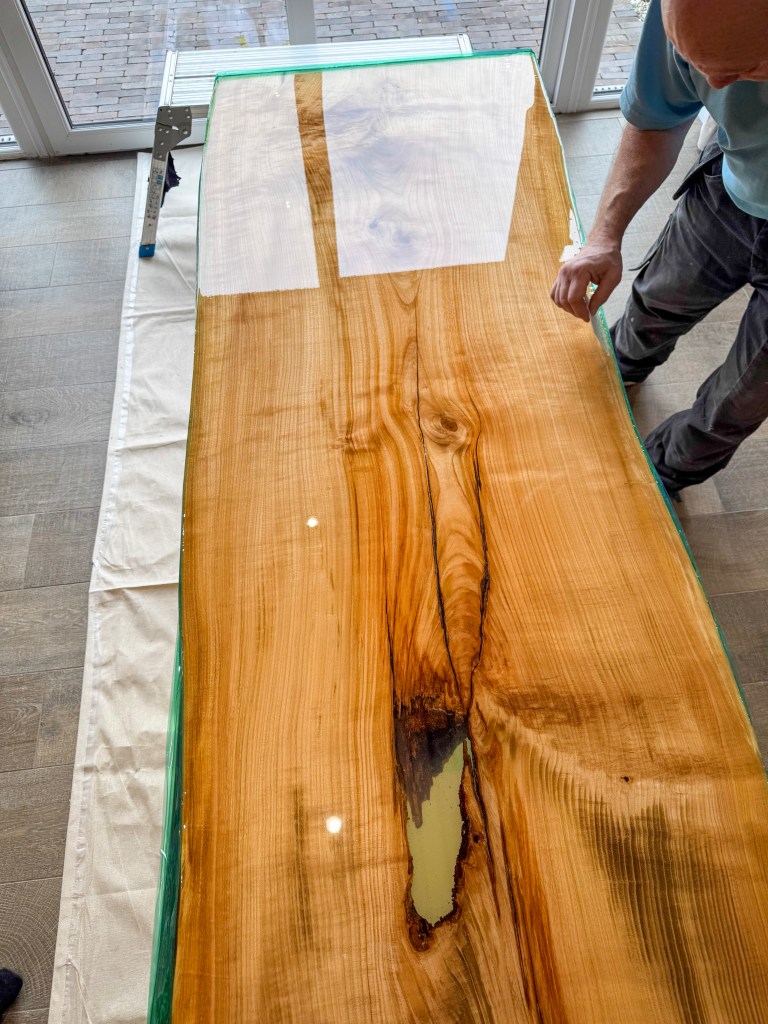
After waiting the right amount of time for hardening, we moved onto stage 2. This involved mixing some of the resin for the top. This stage is intended to seal the wood and fill the grain ready for the final pour. If the grain isn’t sufficiently sealed then air bubbles will get inevitably trapped in the finish and the surface become uneven and patchy as the wood absorbs some but not all of the epoxy.
We mixed and poured the first batch, using a brush to allow the resin to spill over the sides and coat the live edges. The instructions were correct and certain areas of the surface drank up the resin while others absorbed hardly any of it. When we’d finished this pour and hair dried the surface for bubbles, the desk, quite frankly looked awful. In some areas, it looked as if we’d missed pouring any resin onto it at all while others had a glass glaze on it. To be fair, the instructions clearly said this would happen and not to worry, it was completely normal and what should happen. We’d see!
After allowing that to sufficiently harden, again in a controlled temperature environment, we lifted the desk outside and sanded it using the extremely fine grit discs recommended and bought for the job. This left most of the table looking milky and even worse. Again, the advice was that this was normal and that the final pour would fill these tiny scratches and leave the surface like glass.
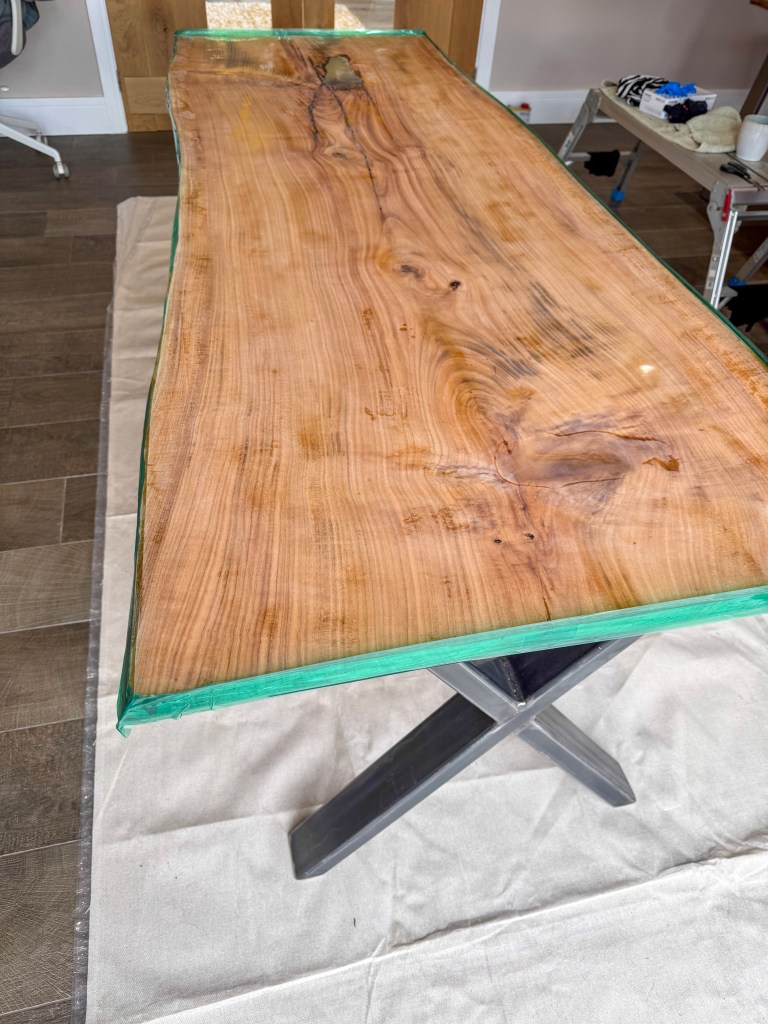
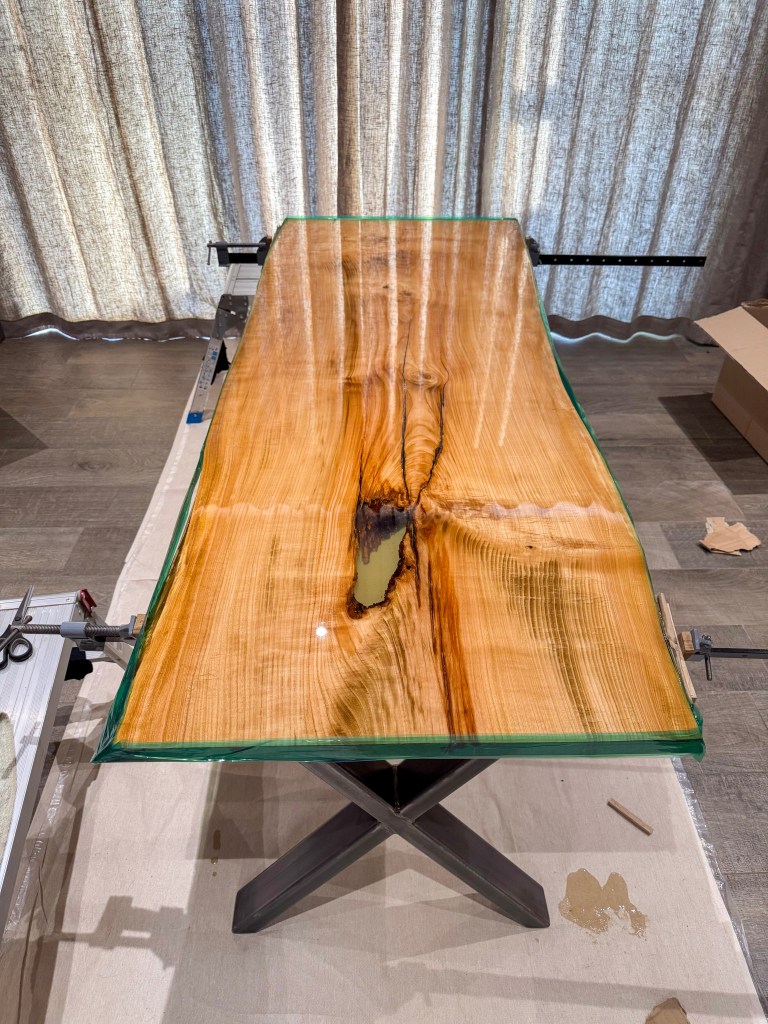
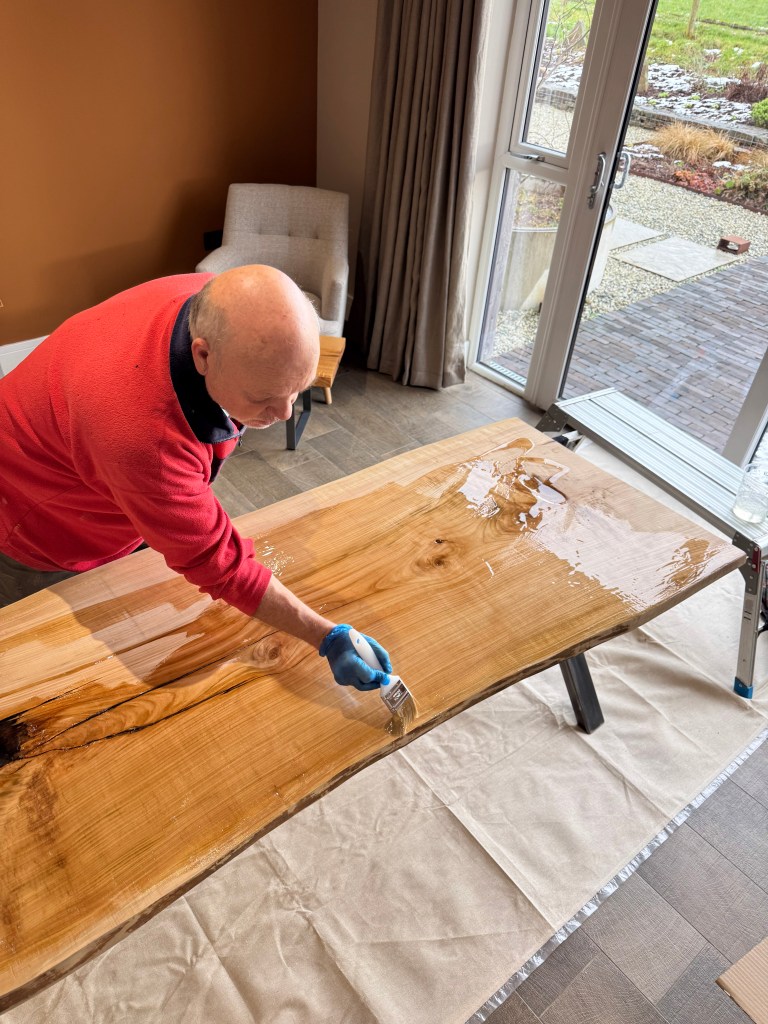
We mixed the final pour and went for it after carefully using the tape to seal the edges so it didn’t run over the sides. It went very smoothly and without hitch or drama. We duly released the air bubbles where we found them until time dictated we had to stop. It already looked incredible. We left the room and patted each other on the back, excited to see it in the morning. Around an hour or so later I couldn’t resist popping back in to admire our handiwork. Imagine my horror discovering the tape had come away from certain points at the side and epoxy was running/dripping onto the floor (luckily we’d protected the tiled floor sufficiently just in case!). Panic set in and I ran out to the workshop to grab clamps and bits of wood to place along the edge and secure underneath. This plan worked…mostly. It wasn’t perfect and extremely annoying. The tape had held until the pressure even out and wasn’t strong enough to adhere to the live edge.
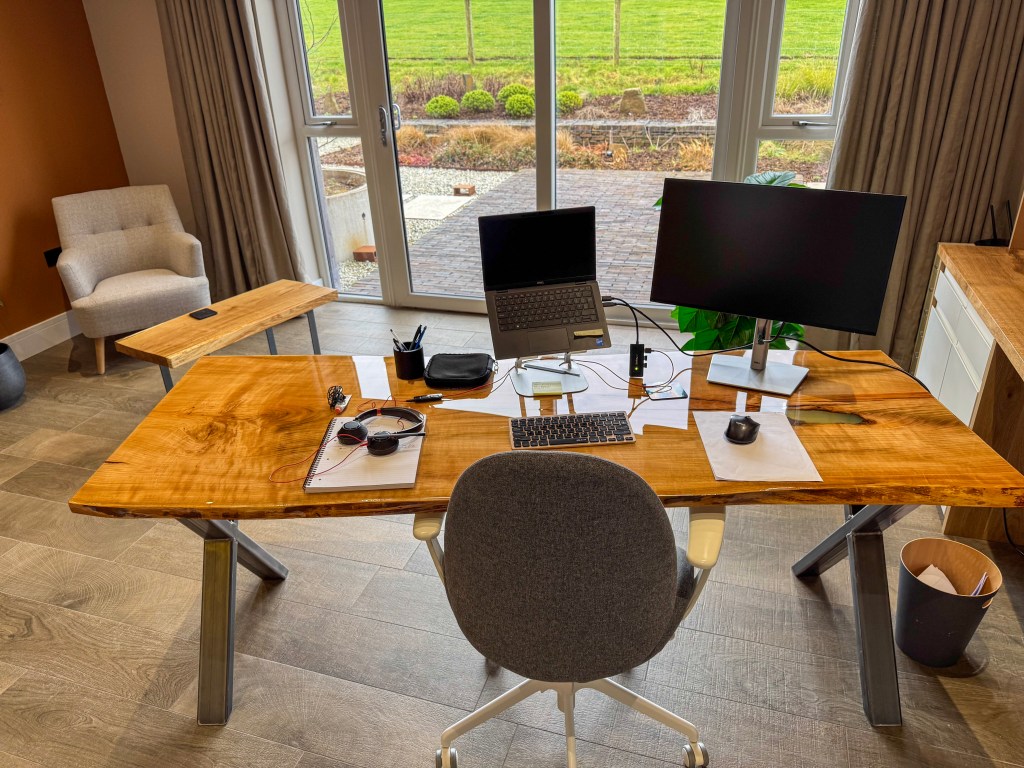
We left this pour for longer than the advice detailed and then surveyed the result. Taking off the tape and clamps I was pleasantly surprised to see they’d held pretty well. As a result, there were some slight imperfections around the edges where excess resin had pooled but overall, the result was stunning. It truly had been given a glass top finish and we couldn’t be happier. After the sufficient hardening and curing time had elapsed I was geared up to sand away the imperfections. This is a tricky and time consuming task of sanding in set directions, evenly across the whole surface, slowly moving up through various grits and polishes until you end up with the same glass like finish you started out with, minus the imperfections. Only, my wife was having none of it. She’d already set up her desk and was working from it and wouldn’t let me ‘tinker’ as she says the flaws are unnoticeable and she adores it as it is! I freely admit, I wasn’t too upset with her…
Costs for both Desks:- Cherry Slab for 2 desks – £860, Glass Cast Epoxy Resin – £180, Etsy Steel Legs (for 2 Desks) – £325 Total = £1,365

Leave a comment