
I was excited to give this a go. I knew I could take my time, plan carefully and research each step before committing to any sawing and cutting. I decided to biscuit joint the boards together to form a hopefully strong door. I’d ordered 4 boards at 20mm thickness and 2 at 45mm. The bigger 2 would form the stiles at each side, sandwiching the 4 20mm. On the back of the door I planned to strengthen and support using boards at 15mm thick to form two ledge and braces, to strengthen, in a ‘Z’ style. The door would ultimately be a little oversized to be trimmed when fitting.
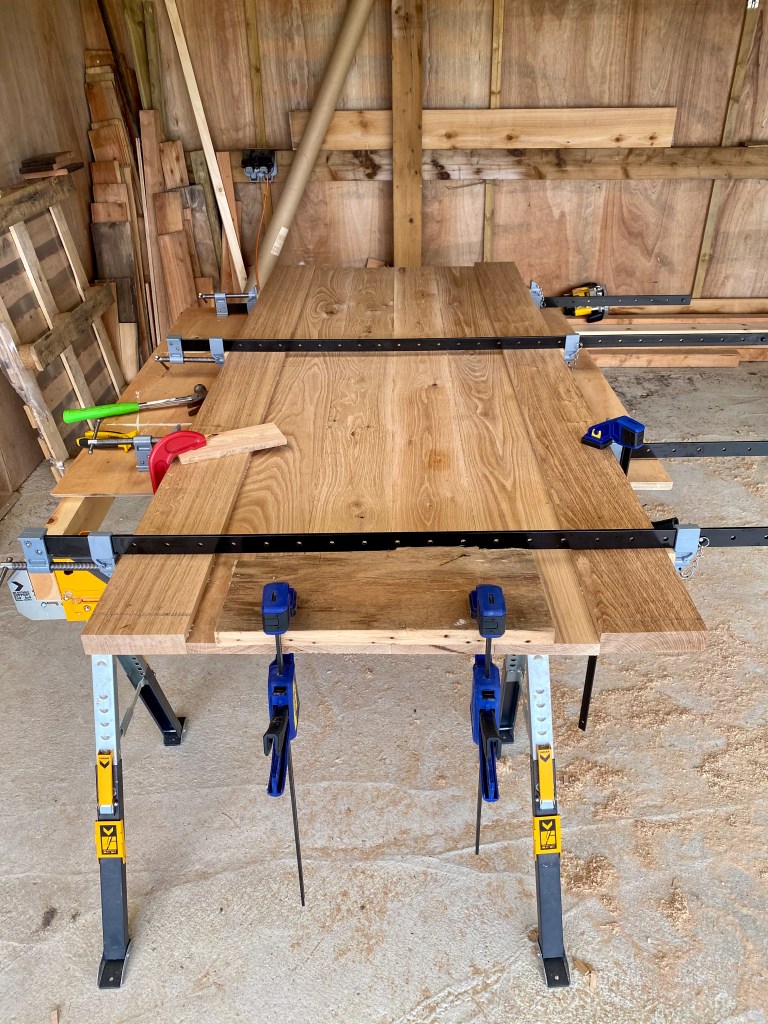
I had to buy some more tools, the most expensive being a Dewalt router to cut the slots for the biscuits. I also knew it would come in handy in the future so wasn’t a one job buy. I also purchased four big and heavy sash clamps, two for the top, two for the bottom to evenly spread the clamping after gluing.
I stored the boards for a few weeks in the room they were ultimately going to end up in to acclimatise them.

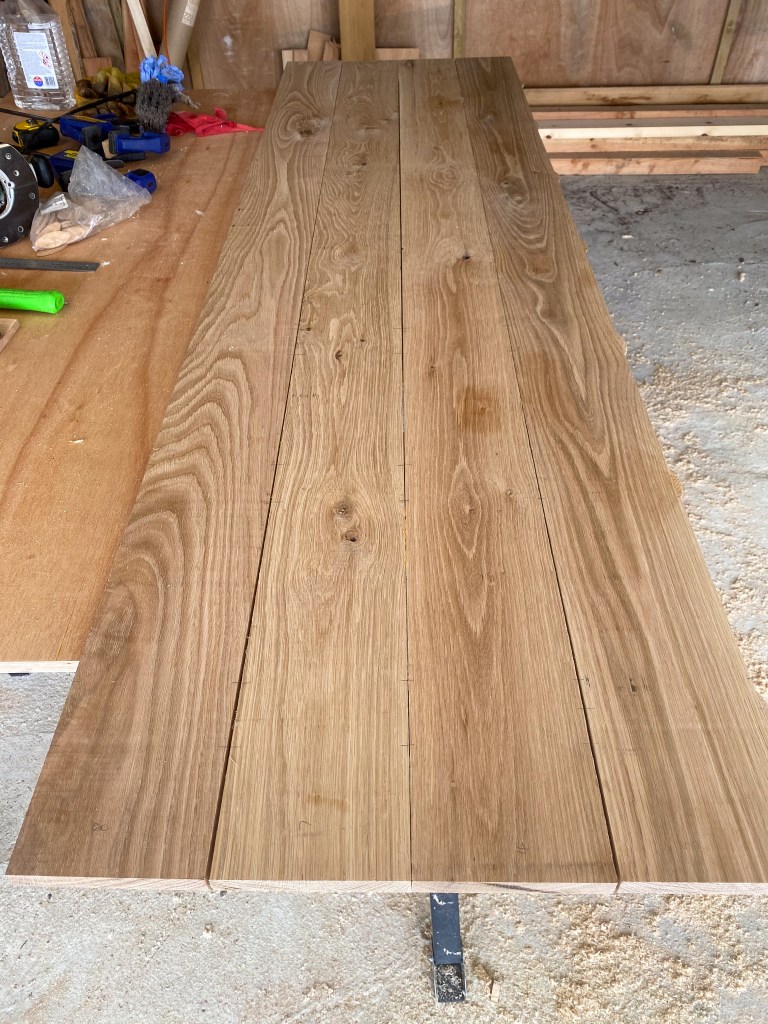
I now had no reason not to start. I did the first part quickly, cut all the boards to roughly the same length. That went without a hitch! Step one done. I then laid them out and played around with what order they’d end up in so that they looked their best.
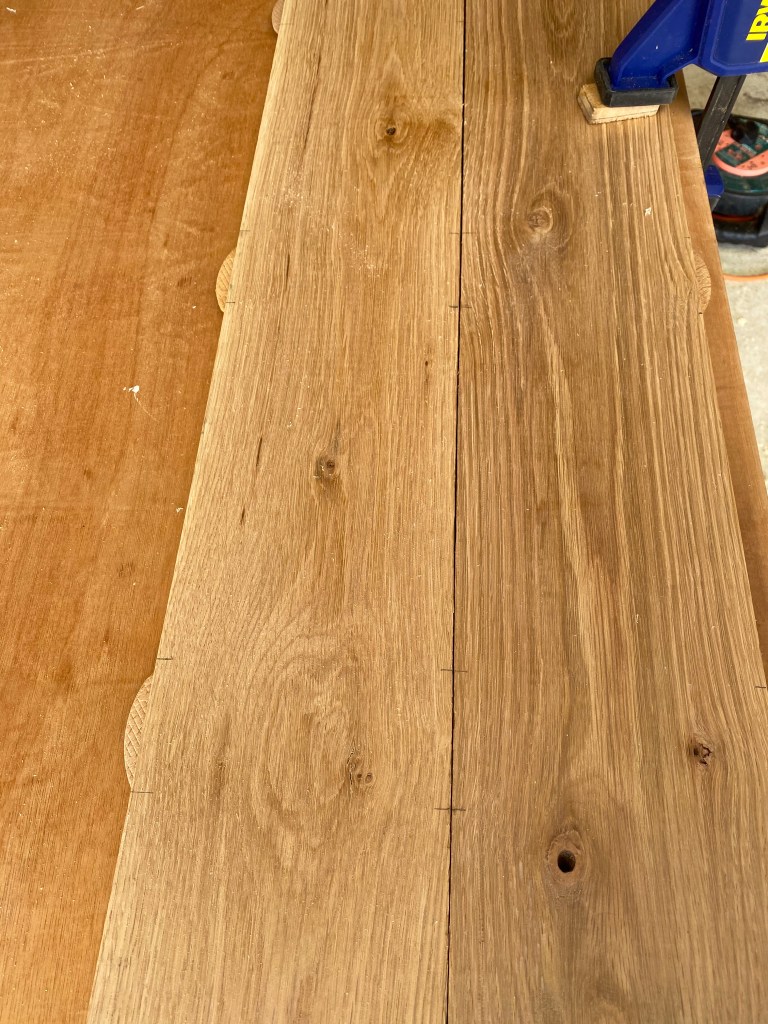

Then came the scary part. Routing the biscuit holes in the sides of each of the boards. Although it’s quite a straightforward and logical process, I took extra care with this and it took me a lot longer than it would someone skilled or who knew what they were doing! It was also the first time I’d handled the router. I admit, I practiced first on some off-cuts. I made sure the slots were at the same height and as central as I could get them depth wise. I’d purchased a biscuit cutting bit for the router especially for the task as I knew I’d be using it more than once if this door was a success. Remembering which way round a board goes and working upside down to your work piece really did test my brain at times!
When I’d completed cutting all the slots, I did a dry fit with all the biscuits in place just to check I’d done it correctly and everything was a good tight fit. When I was happy, I took a very deep breath and started to glue up. I was quite nervous about this aspect for some reason. I’m not sure why. It was my first ever glue up and I didn’t know what to expect. I was super worried about the Gorilla Wood glue drying too fast and me being too slow for it all to work out. However, I got going and quickly got into a rhythm with it. In no time at all I had, for the first time, something that resembled a door!


Leave a comment